
Following my previous blog post – Build an ATAK Dev Environment, I felt posting a 101 guide to plugin development was required!
The ATAK core software allows extensions to be built adding functionality through the plugin architecture.
Unfortunately the documentation for the SDK is rather sparse at this stage, so I am hoping this and future posts will add to the community documentation to allow open development of plugins, supporting the TAK software ecosystem.
Obtaining the SDK
Before we can develop a plugin we need a few things, Android Studio the SDK and potentially a target device.
The SDK is available here: CivTAK 4 SDK . Download and extract the SDK.
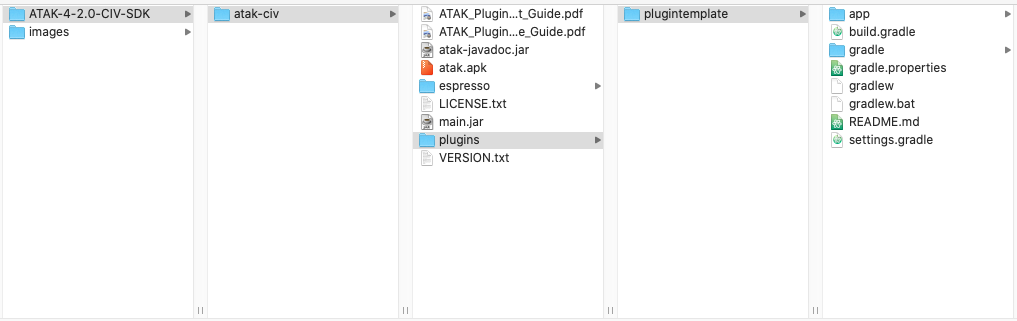
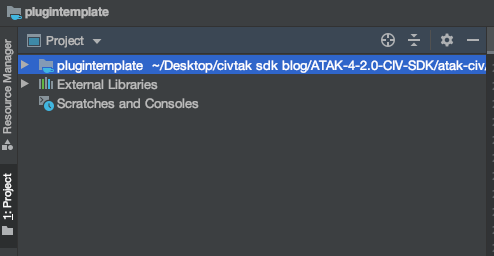
As can be seen from the screenshot the SDK has a number of files associated to the SDK in the atak-civ directory and a template plugin in the plugins directory. The SDK includes a development release of the ATAK APK, which allows deployment of the underdevelopment plugin for testing.
Setting up the SDK
Launch Android Studio and open the plugin template directory, from the downloaded ATAK -4-2.0-SDK folder. Once Android Studio has opened, wait for Gradle to finish configuring/building the project.
Before we can start developing, we need to get the SDK into a position to allow us to deploy to our developer ATAK instance and to build the plugin.
First we need a debug signing key, I just re-used the key I generated for my ATAK dev environment. To ease some Googling, the command is as follows;
keytool -genkeypair -alias androiddebugkey -keypass android -keystore debug.keystore -storepass android -dname "CN=Android Debug,O=Android,C=US" -validity 9999We need to place this in a location where the SDK Gradle scripts can find it. I have a habit of ensuring it is located in ATAK-2.0-CIV-SDK/atak-civ/keystore/debug.keystore
After making the directory we need to update the Gradle configuration script so it can find the debug key.
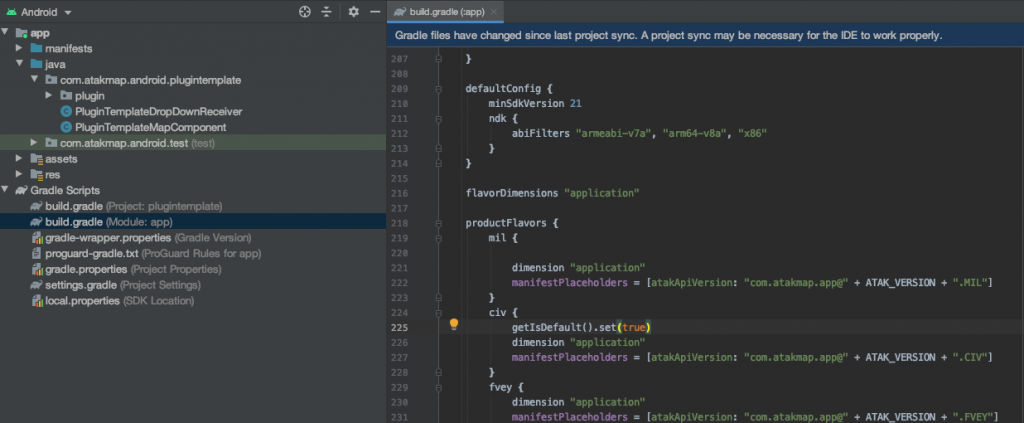
To update the script open build.gradle (Module:app) in Android Studio and look for code line 139 (signingConfigs {debug{}}) and update the paths with relative references to where we locate the keystore and update the storePassword, keyAlias and keyPassword to what you set when the key was generated.

The next is the result of some trial and error when I was originally attempting to get the SDK to build, not sure if it essential, however I couldn’t get a build to work without doing this. So in the same file at line 220, move the getIsDefault().set(true) to line 225 under the civ flavour;
Hit Sync Now and allow the project to re-sync. If you have the downloaded SDK and it’s not in a Git repo it will throw an error, however the configure should still work.
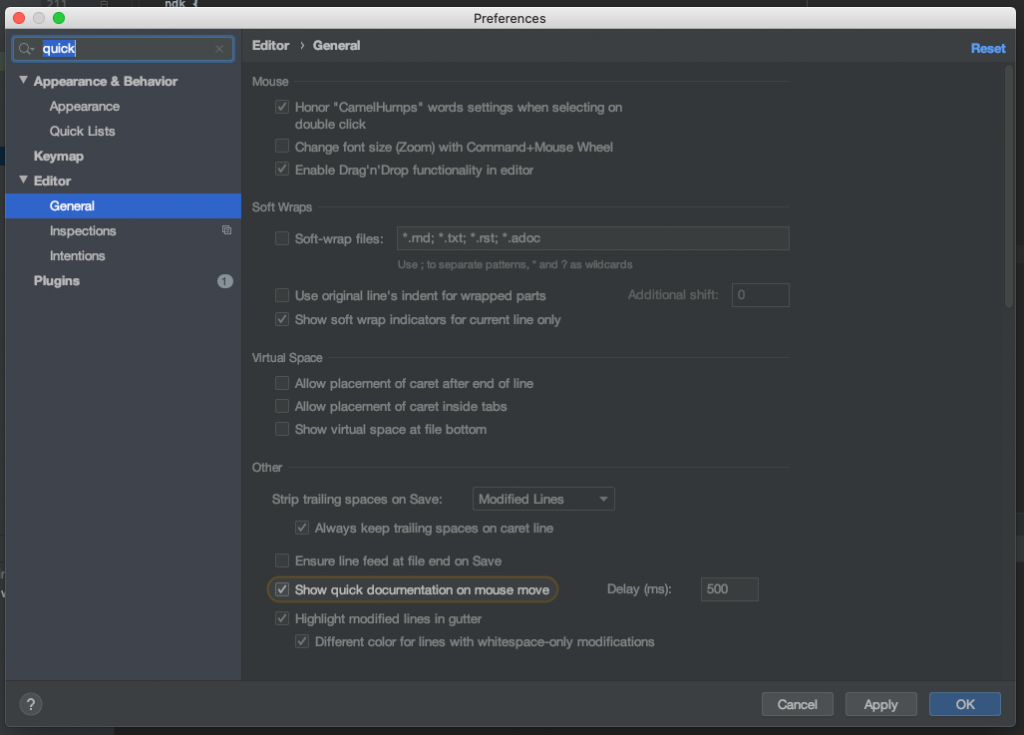
Now set up a little of our build environment, first we can activate quick documentation from the Android Studio preferences menu (Show quick documentation on mouse move);
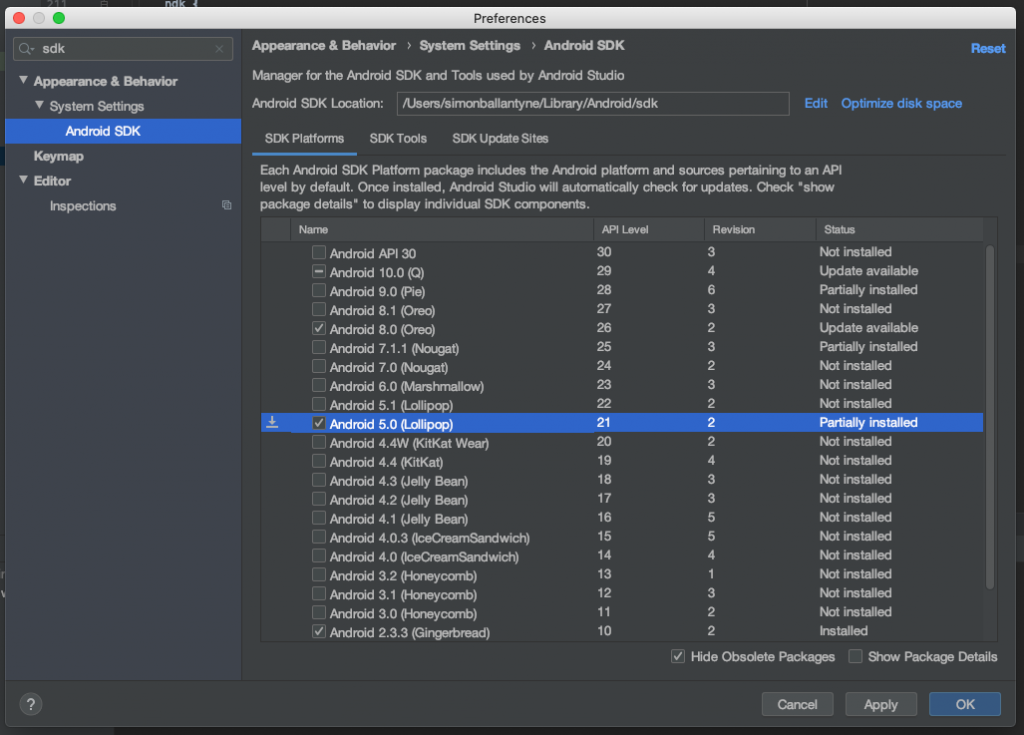
And ensure we have Android SDK 21 installed;
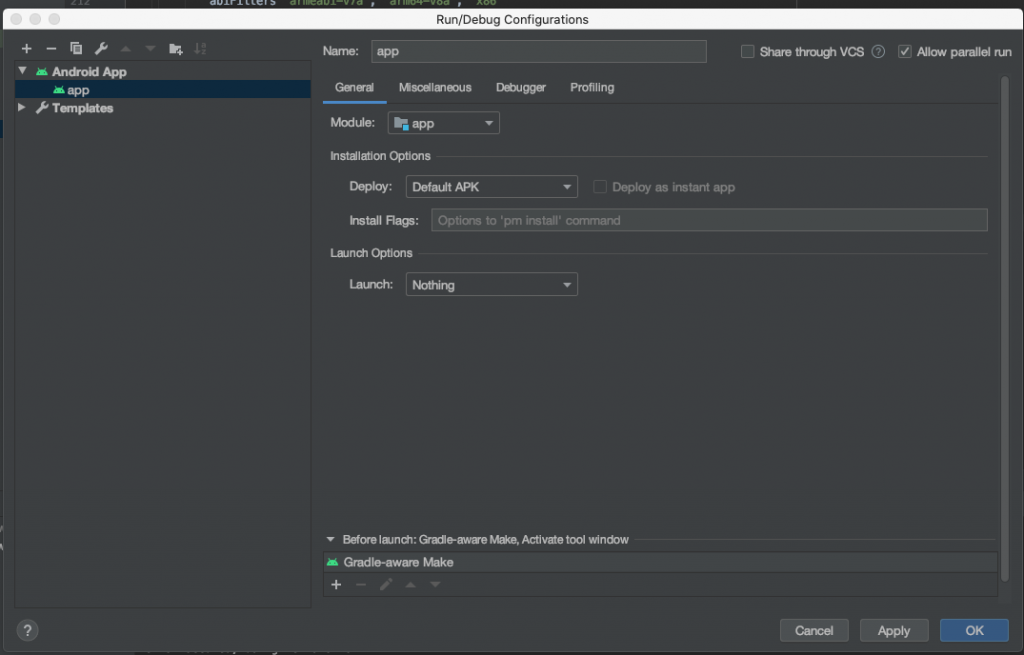
Now we need to edit the configuration of how Android Studio runs the plugin, click on the app configuration button on the top menu;
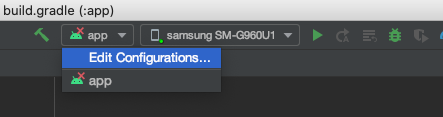
Under installation options ensure that Launch Options / Launch is set to nothing.
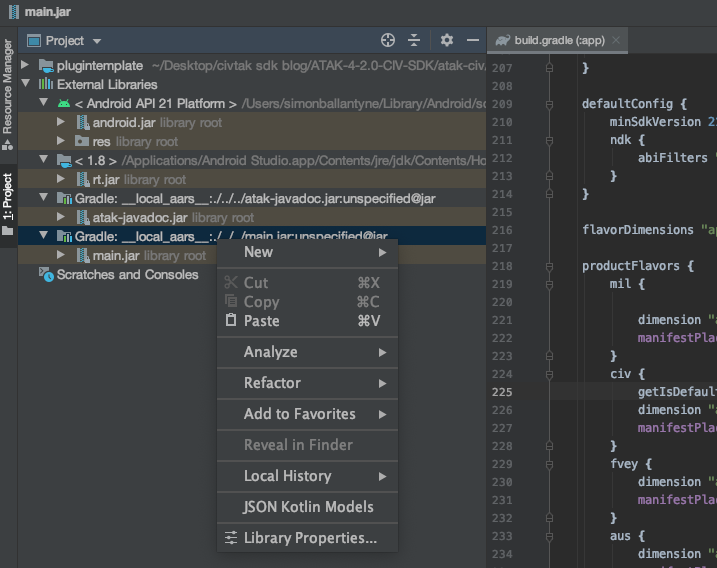
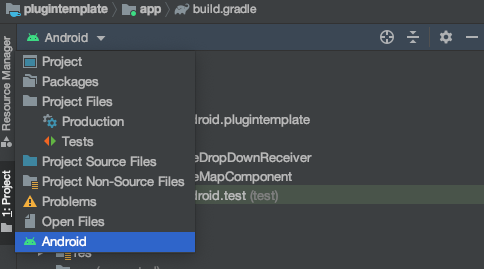
Now we can set up the documentation by switching Android Studio to Project View;
and right clicking on the Gradle:__local_aars:..///.//.main.jar:unspecified@jar and selecting Library Properties;
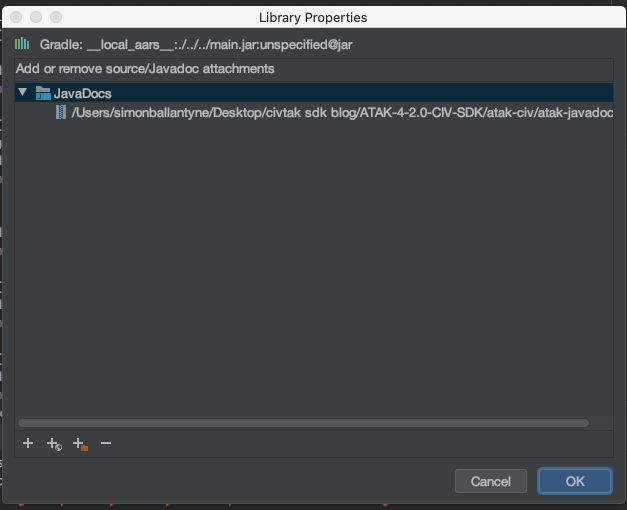
Now we need to click the plus button at the bottom of the screen and browse to the SDK directory and select atak-javadoc and click ok.
Configure an Emulator
This is a very quick way of getting ATAK to run in the Android Studio emulator, this worked for me on a late 2012 Mac Book Pro, as usual your mileage may vary!
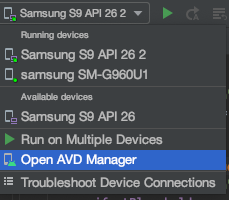
Start by opening the AVD manager in Android Studio and Create Virtual Device;
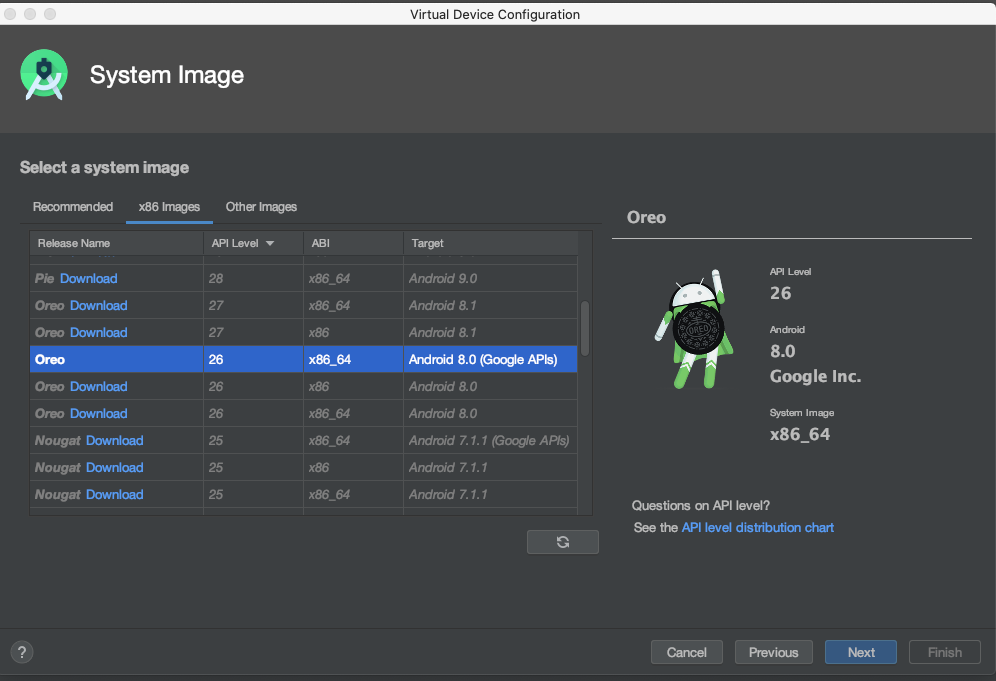
Select a phone format or define your own in the menu and select next, once you get to the System Image page, select the x86 images tab and ensure you select a release that has the x86_64 ABI, click next and then finish (ensure you select landscape startup orientation).
Back on the Your Virtual Devices page, you should now be able to click the play button next to your new image and start the emulator. Once started drag the ATAK.apk file that came with the SDK onto the running emulator window to install. Once installed launch the ATAK application and run through the initial configuration. The last couple of menus took a little while to respond, be patient and it should spin up ATAK ready for our plugin.
Ensure you have the emulator selected in Android Studio for the application deployment, if you keep getting cryptic errors about INSTALL_FAILED_VERSION_DOWNGRADE, it may be that you’re not targeting an emulator/device with ATAK running.

Plugin Hello World
Now we have our SDK and environment running we can use a Hello World test to see if we have a fully working environment. Make sure you put Android Studio back to Android view;
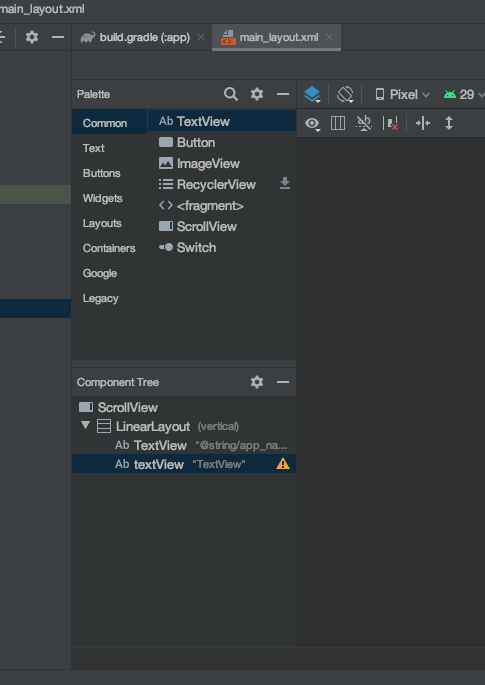
Now open res/layout/main_layout.xml, for this Hello World, we will just use a simple TextView to see if we can compile and deploy.
Drag a TextView onto the ComponentTree at the bottom of the hierarchy;
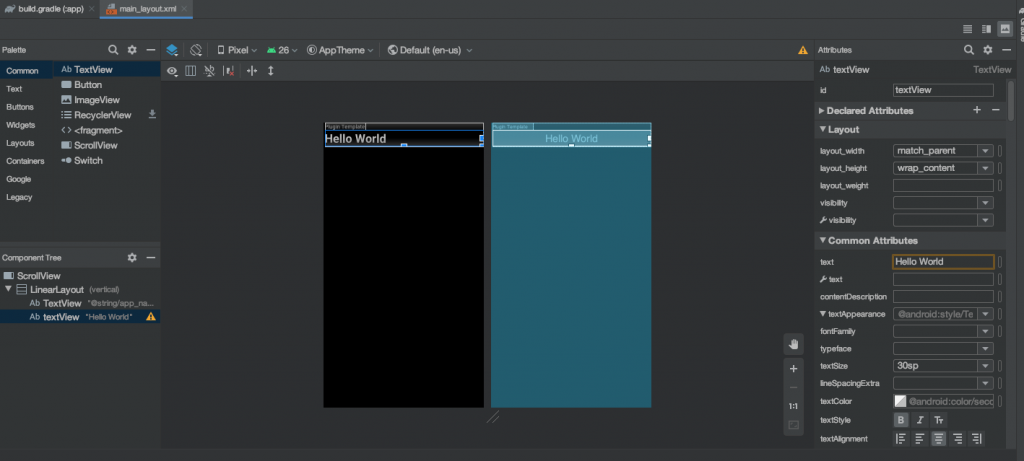
Update the text attribute in the Attribute menus to Hello World, adjust font, size etc. if you would like;
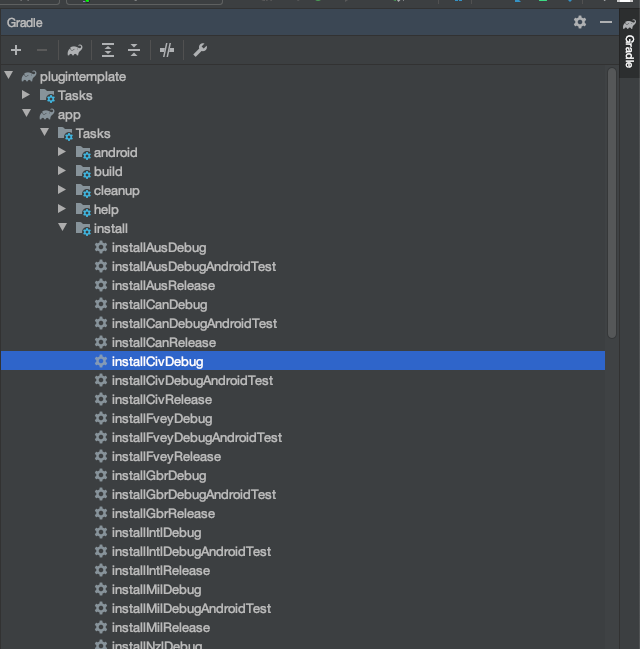
With that done, we should now be able to build a debug and deploy to the emulator. Click on the Gradle menu on the left of the Android Studio window and select plugin template/app/install/installCivDebug.
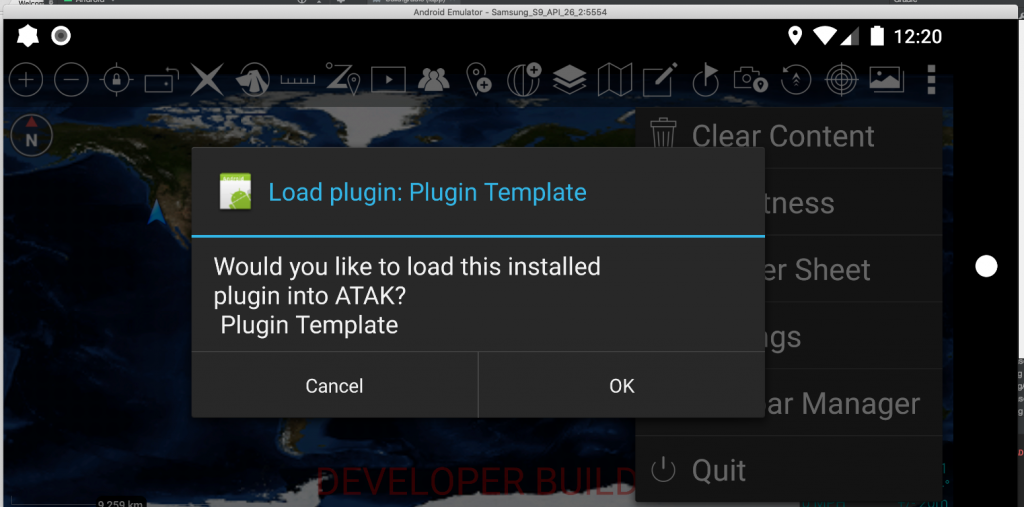
If the build works, you should now be shown the plugin install dialog in ATAK on the emulator;
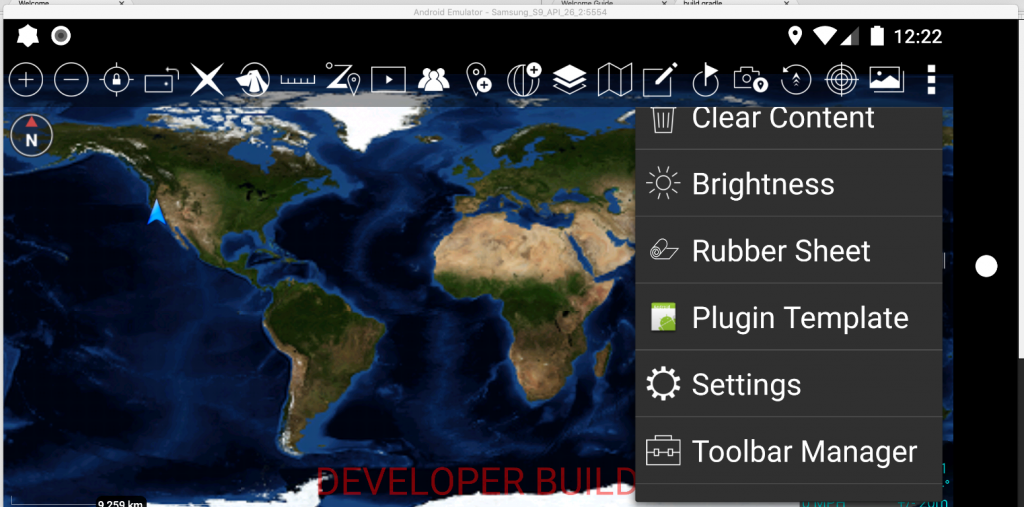
Once installed your plugin will be available in the main ATAK menu;
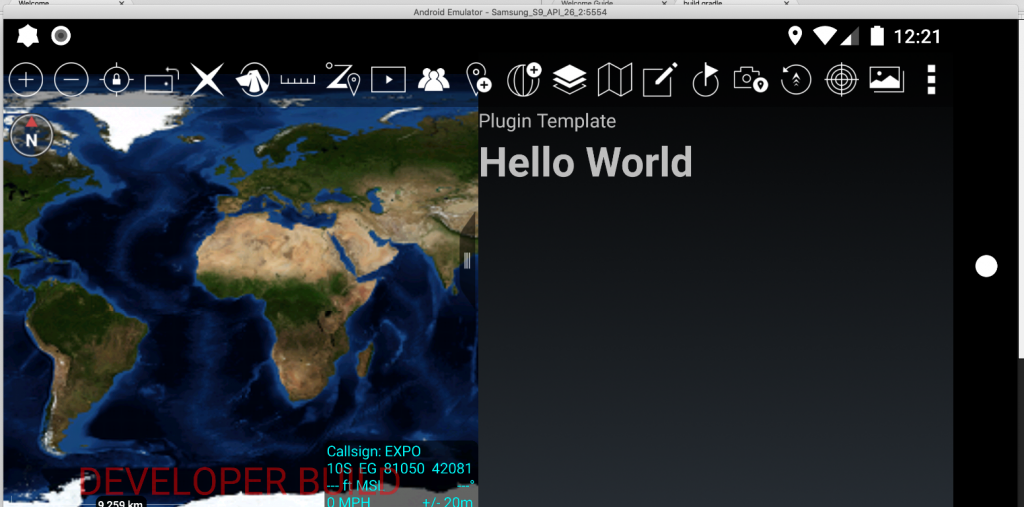
Click on Plugin Template and you should be greeted with your Hello World App. Et Voila!
Keep an eye out for the next blog post, I will cover the Plugin structure in more detail to allow a functional application to be built, hopefully this post will now allow you to get a SDK dev environment built along with a working Hello World plugin!
